 |
| Your favorite old t-shirts can find new life as a fun scarf. |
Give New Life to Old T-Shirts!
Do you have some favorite old t-shirts that are too worn to wear but you're keeping for their sentimental value? You know, all those great old concert t-shirts and souvenirs from fun trips that you can't bear to give or throw away? We all have them. Give your favorite old t-shirts new life by turning them into a cozy, funky patchwork scarf. Here is everything you need to know for this easy and fun project.
What You'll Need
For this project, you will need:
- 7-14 old, adult-sized t-shirts (lightweight sweatshirts also work)
- Plastic quilter's ruler
- Scissors or rotary cutter
- Cutting mat (if using a rotary cutter)
- Straight pins
- Sewing machine
- Thread
- Needle for hand-sewing
Getting Started
First, gather the required number of t-shirts. To make a scarf that is 10-inches wide and 70-inches long, you will need 7 to 14 t-shirts or lightweight sweatshirts. If you will be using the front and backs of all t-shirts, you will need seven, to make 14 squares. For an 80-inch-long scarf, you will need a minimum of eight t-shirts, front and back, to make 16 squares. Some t-shirts may be large enough to cut two squares from each side.
Selecting the T-Shirts
One of the great things about this project besides its ease is its versatility. You can use those old t-shirts that have special sentimental value and make a memory scarf. You can shop at the thrift store for t-shirts that have fun prints or a common color scheme or that fit a particular theme. You can make a tailgating scarf using t-shirts with your favorite team’s logos and colors. You can make a scarf with a holiday theme or vacation theme. The possibilities are endless.
Tip: I recommend using a combination of t-shirt fronts and backs, prints and solids. If the printing on the t-shirts is stiff and scratchy, you will want to use the softer fabric from the unprinted side of the t-shirt for the part of the scarf that will wrap around the nape of your neck.
Launder and dry all t-shirts before continuing.
Cutting the Squares
Cut the desired number of 11-inch squares from whatever parts of the t-shirts you want to use.
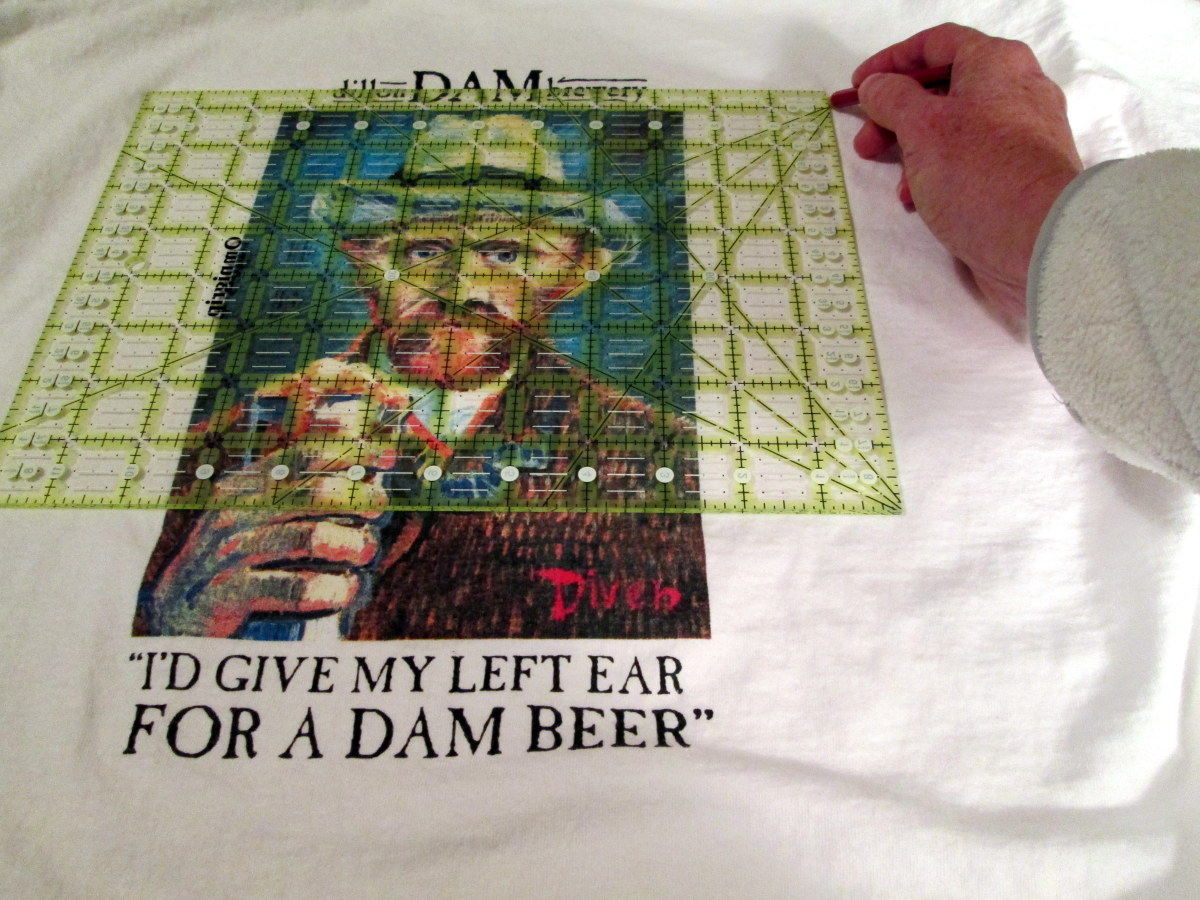
The easiest way to cut squares from the t-shirts is using a quilter’s ruler and rotary cutter. If using a rotary cutter, you also will need a rotary mat to protect your work surface. (See "Tools for Making Your T-Shirt Scarf" below.)
A quilter’s ruler is a square plastic template. Because the ruler is see-through, you can position it over exactly that portion of the t-shirt print that you would like to use. Once the template is positioned, simply cut around it using the rotary cutter.
Using a Quilter's Ruler and Rotary Cutter:

Source
If you don't have a rotary cutter and mat, another option is to position the quilter's ruler on the t-shirt and then trace around it with a pencil. Using the pencil marking as a guide, cut out the square with a sharp scissors. This method works best for lighter-colored t-shirts because it may be difficult to see the pencil markings on dark fabric. For dark fabrics, use white chalk.
Using a Quilter's Ruler and Pencil:
Source
If you do not have a quilter's ruler, you can make your own square template using cardboard or paper. If using paper as a template, it may be easiest to pin the paper to the t-shirt to avoid having the paper slip as you cut around it.
Arranging the Squares
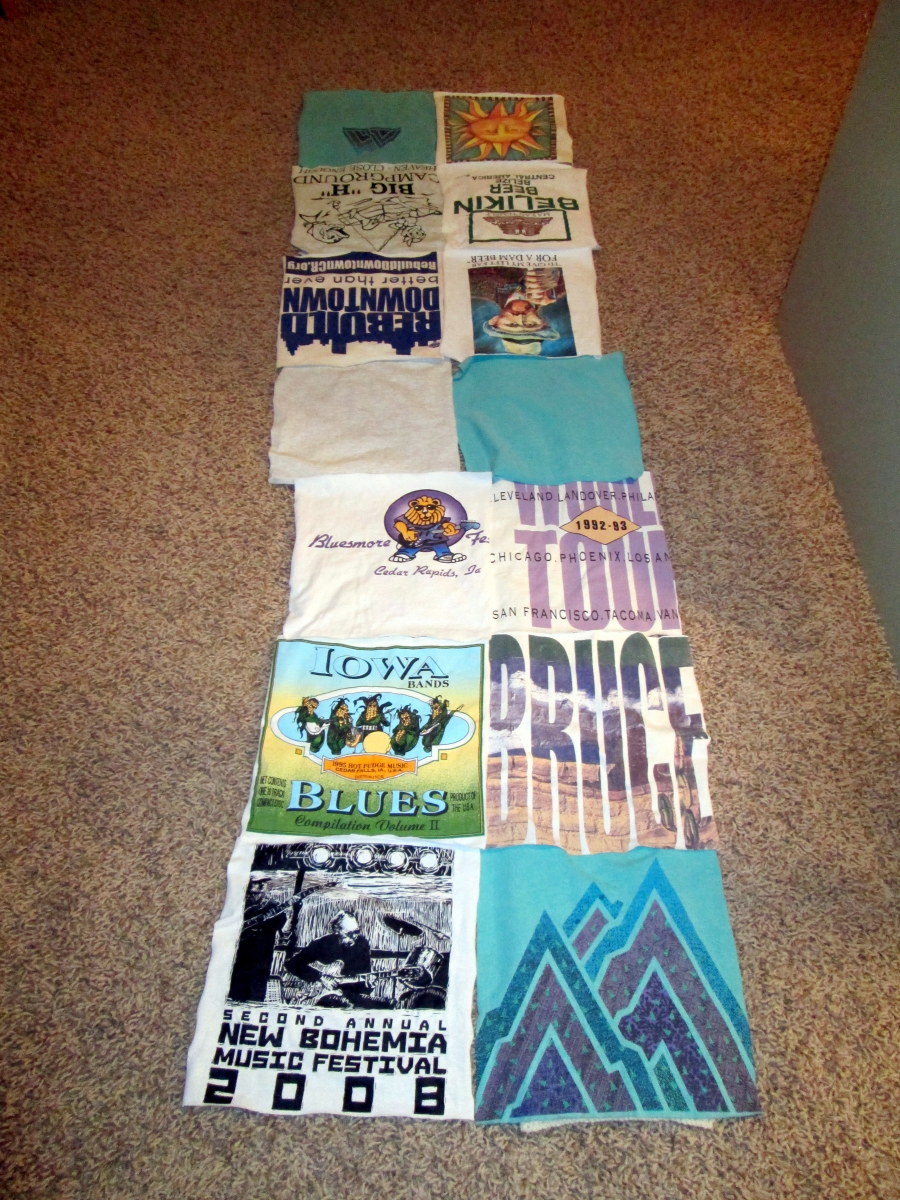
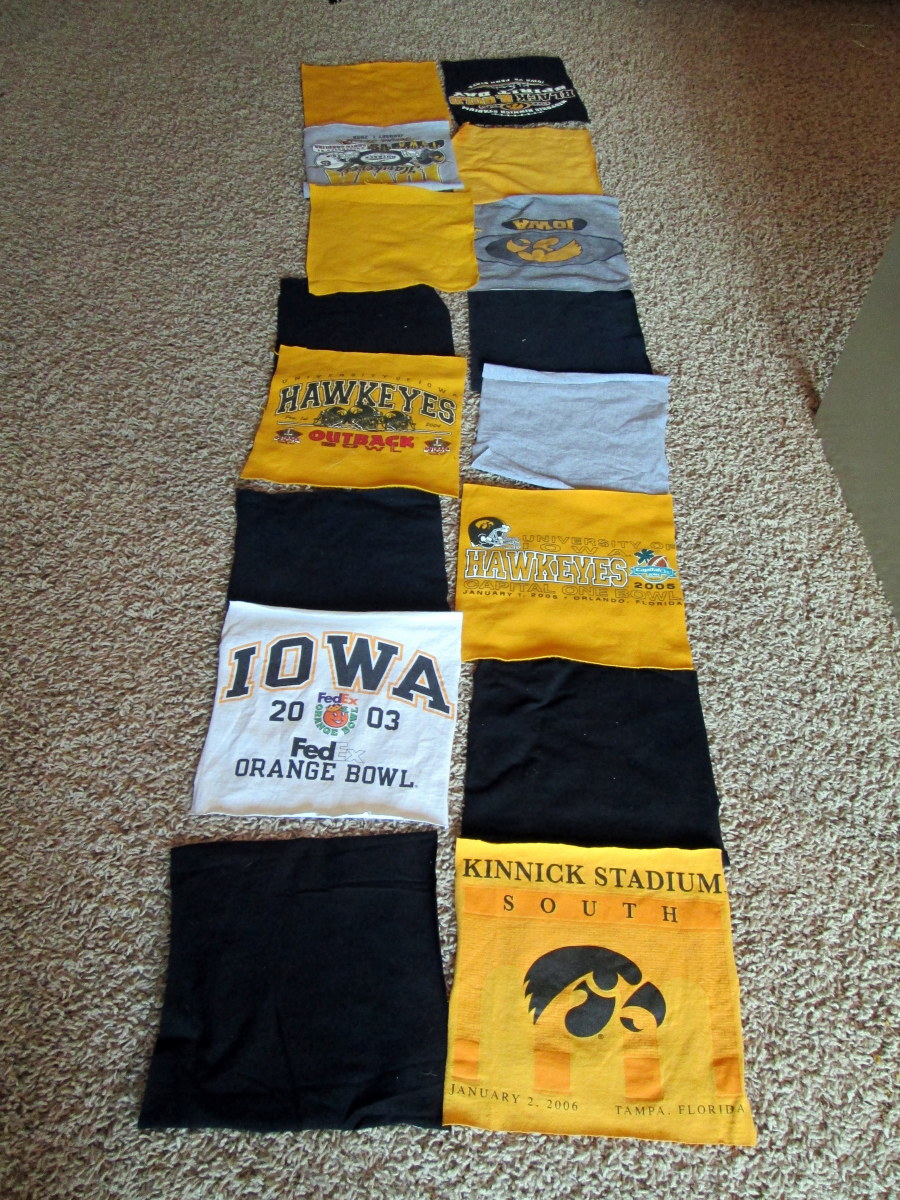
On a large work surface or the floor, lay out the squares in two parallel columns of seven (or eight) two-square rows. One column will form the front side of the scarf and the other will form the back side of the scarf. Switch direction of the squares after the halfway point of the two columns so the prints are oriented correctly when both ends of the finished scarf are hanging down around your neck (as shown in the pictures below).
Arrange the squares into a pleasing pattern. You may want to avoid using two squares with thick, heavy prints in the same row as the double thickness may cause the finished scarf to be too stiff.
Here are two examples:
Source
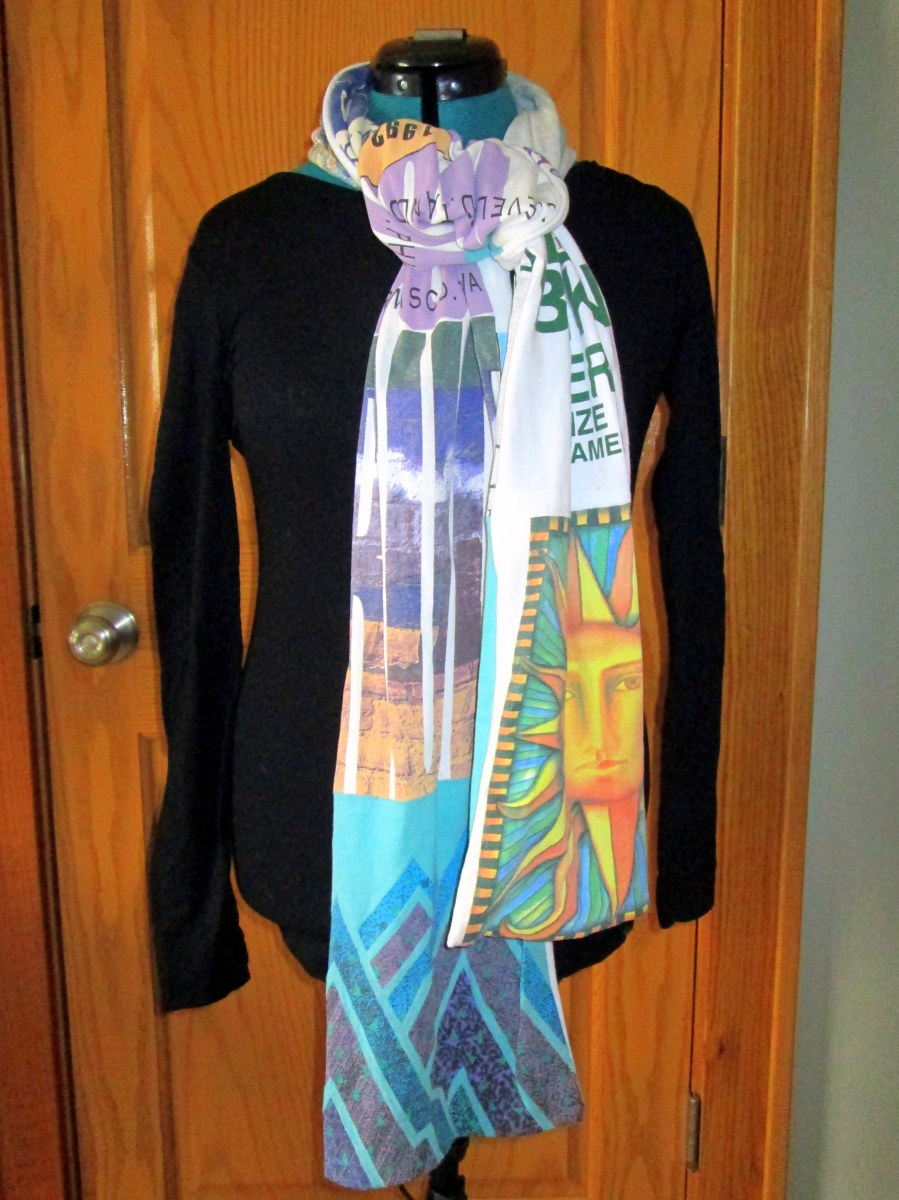
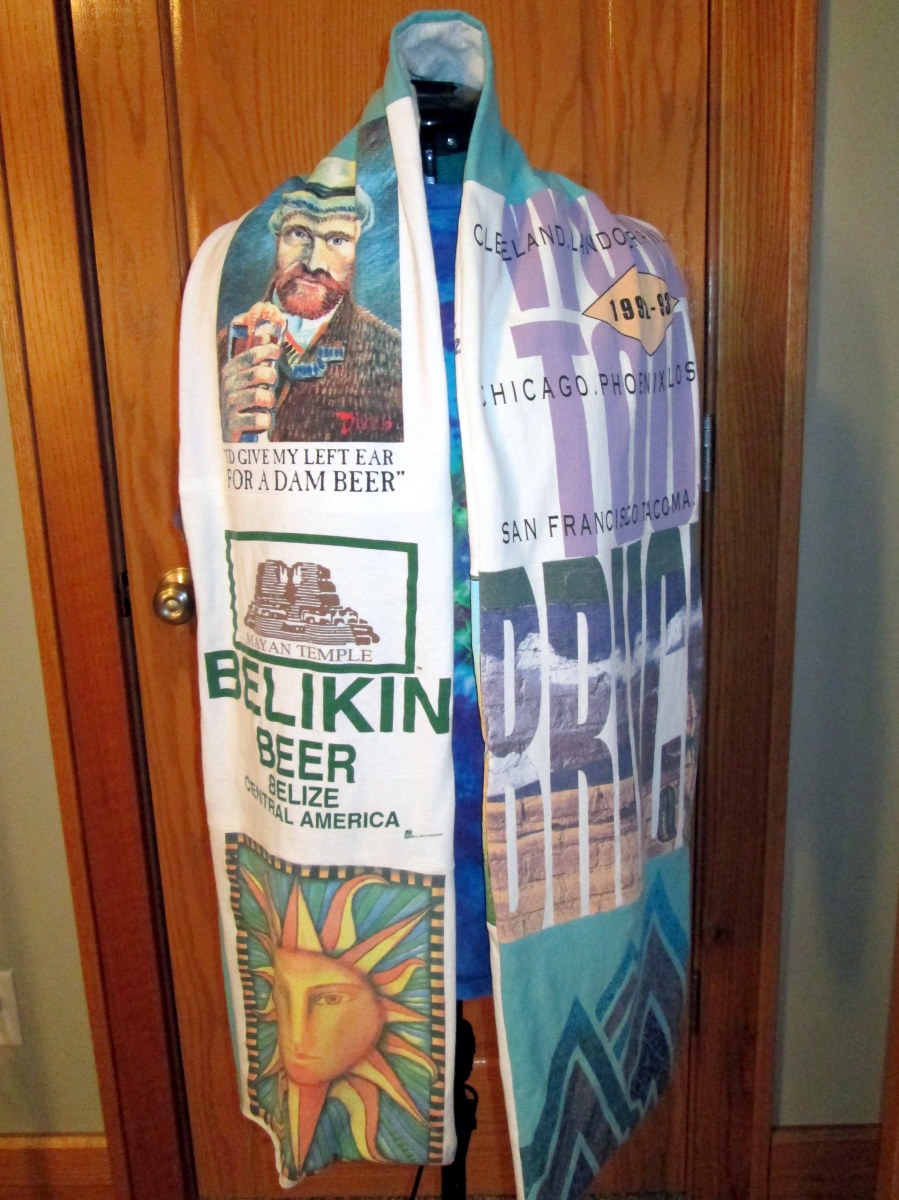
Scarf 1
For this scarf, I used a total of 10 t-shirts. I used mostly the printed sides of the shirts, including a Bruce Springsteen 1993 World Tour t-shirt, which was printed on both sides, but included a couple of solid squares at the neck.. The teal Steamboat t-shirt was large enough for three 11-inch squares.
Source
Scarf 2
For my Iowa Hawkeye tailgating scarf, I used two lightweight sweatshirts (fronts and backs) and seven t-shirts, including two solid black shirts. (Iowa's school colors are black and gold.) For two of the t-shirts, I used the printed side only. The plain backs of those shirts will find new life as dust clothes.
Sewing the Scarf
Working one column at a time, pin the top of the bottom square (Square 1) to the bottom of the next square (Square 2), right sides together. Using a sewing machine (see video below for tips and how-to), sew across the width of the squares, leaving a one-half inch seam allowance.
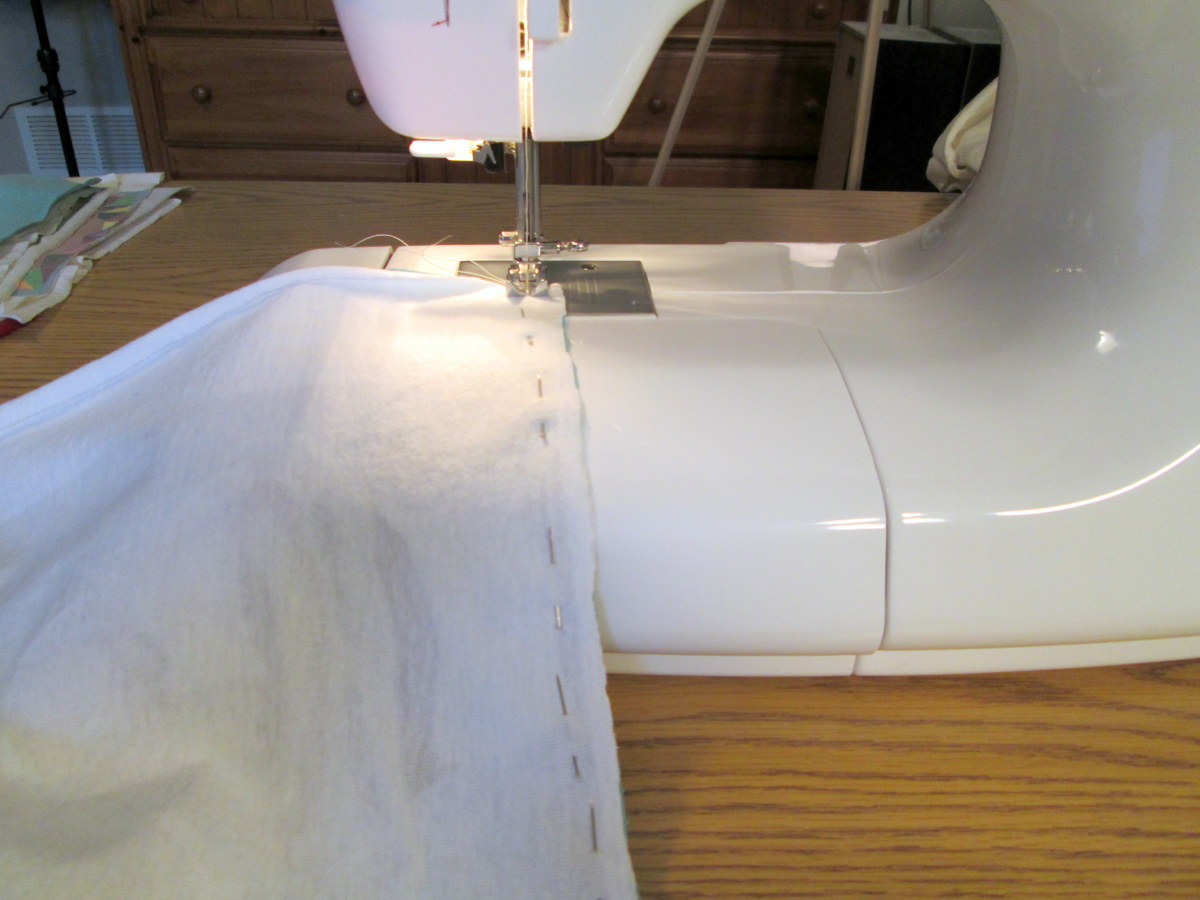
Source
Next, pin the top of Square 2 to the bottom of Square 3, again with right sides together, and sew together with a one-half inch seam allowance. Repeat with the remaining squares of the first column. To reverse the pattern at the half-way point, pin the squares together at the tops and sew, then pin bottom to top for the remaining squares. Always make sure you are sewing with right sides together.
Repeat this process with the second column.
When you have completed both columns, use an iron to press open all seam allowances.
You now will have two panels that are each 70-inches long. Pin the panels together with right sides facing in. Sew around all sides, leaving a half-inch seam allowance and a three-inch opening on one end of the scarf.
Turn the scarf right-side out through the opening at the end. Use a needle and thread to slipstitch the opening closed.
Enjoy your new scarf!
Source
No comments:
Post a Comment